
How to Build a Garden Gate?
Introduction
A garden gate is an essential part of any landscape. It not only has practical uses but also adds beauty to the surroundings. It serves as an entry point to your garden, offering protection and seclusion while enhancing the overall appearance of your property. Whether you have a small garden in the city or a large estate in the countryside, a well-designed garden gate can make a big impact.
In this article, we will show you how to build your garden gate using high-quality timber materials from Davids Timber LTD. We'll cover everything from planning and designing to constructing and adding final touches. You'll discover all the necessary steps to create a gate that is both stunning and long-lasting, perfectly matching your garden style. Even if you're new to DIY projects, our detailed instructions and expert advice will make it simple for you to get started.
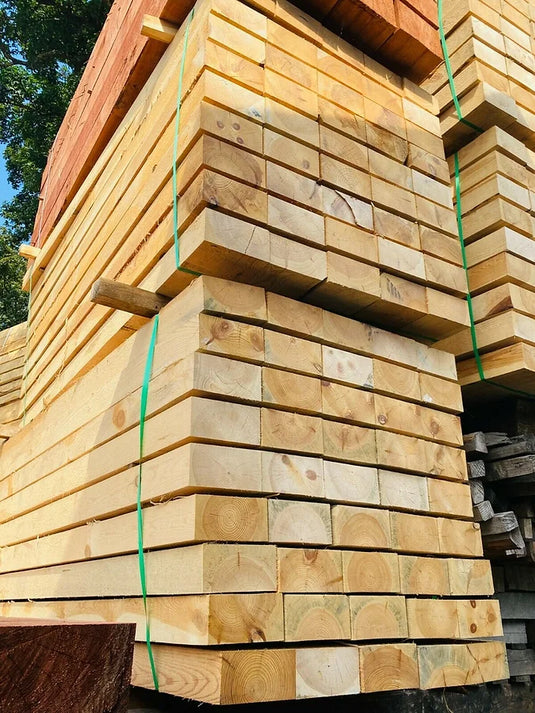
If you're interested in top-notch materials for your garden gate, Davids Timber LTD offers some excellent choices like their Gr A++ Pine sleepers and Premium Pine Sleepers. These options not only provide strength but also add unique features to your garden gate.
Let's begin by exploring different types of garden gates!
Types of Garden Gates
Garden gates come in various designs and materials, each offering unique characteristics and benefits. Here's an overview of some popular types:
Softwood Garden Gate
Characteristics:
- Material: Made from lighter woods such as pine or cedar.
- Weight: Generally lighter, making them easier to transport and handle.
Advantages:
- Cost-effective: Typically more affordable than hardwood options.
- Ease of installation: The lighter weight facilitates a straightforward installation process.
- Versatility: This can be easily painted or stained to match your garden's aesthetic.
Tongue and Groove Garden Gate
Characteristics:
- Material: Constructed using interlocking boards that fit snugly together.
- Design: Provides a sleek, uniform appearance with no visible gaps.
Advantages:
- Stability: The interlocking design adds robustness and stability to the gate structure.
- Privacy: Offers excellent privacy due to its seamless surface.
- Durability: Less prone to warping or splitting compared to other gate types.
Feather Edge Garden Gate
Characteristics:
- Material: Utilizes thick wooden slats, often oak or pressure-treated timber.
- Construction: Features overlapping boards for a sturdy build.
Advantages:
- Resilience: Highly durable, capable of withstanding harsh weather conditions.
- Classic look: Offers a traditional appearance that complements many garden styles.
- Security: The robust construction provides an extra layer of security for your garden.
Choosing the right garden gate involves considering your specific needs, whether that's ease of installation, privacy, durability, or aesthetic appeal. Each type has its own set of features that can enhance the functionality and beauty of your garden space.
In addition to the gate itself, other elements like river pebbles can be used to enhance the overall appeal of your garden. These pebbles serve multiple purposes, from decorative components to edging ponds and even as a covering material. Another aspect to consider is firewood, which can provide warmth and ambiance with a crackling fire all year round, making your garden a cozy retreat.
Planning and Designing Your Garden Gate

Before you start building your garden gate, it's important to plan and design it effectively. This will ensure that your gate not only looks good but also functions well. Here are the steps you should follow:
Step 1: Measure the Height and Width Accurately
The first thing you need to do is measure the height and width of the gate opening. This will help you determine the size of the gate you need to build. Here's how you can do it:
- Use a tape measure to measure the exact height and width of the gate opening.
- Write down these measurements carefully, as they will be used throughout the building process.
Step 2: Calculate the Quantity of Materials Needed
Once you have the measurements, you can calculate the quantity of materials needed for your gate. This includes timber for the frame and any other materials required for additional features like an arch. If you're looking for high-quality timber options, Davids Timber LTD offers durable choices such as their New Brown Pressure Treated Unbanded Scaffold Boards/Planks which are perfect for constructing a sturdy gate.
Step 3: Consider Gate Details
Attention to detail can make a big difference in both the functionality and appearance of your gate. Here are some key elements to consider:
- Hinges: Choose strong hinges that can support the weight of the gate.
- Arches: Decide whether you want to incorporate an arch or any other design element into your gate. You can use a pencil and a piece of string tied at both ends to sketch out your designs on the ground.
- Upcycling: Another interesting option is to upcycle reclaimed timber sleepers for your gate. These previously used wooden beams can add a unique touch to your design while being environmentally friendly.
By planning thoroughly and paying attention to these details, you'll be able to build a garden gate that meets your needs and looks great too. Plus, it will save you time and prevent any potential problems during the construction process.
Building the Gate Frame
Creating a sturdy frame is fundamental to ensuring your garden gate stands firm and functions well over time. Here's a step-by-step guide:
1. Gather Your Materials
- Fence Posts: Use high-quality, treated timber posts for durability. If you're looking for reliable brown-treated timber fence posts, Davids Timber LTD offers a selection that can provide you with the necessary support.
- Planks: Selected for the frame's horizontal and vertical components. You can explore various options like hardwood and scaffold boards from Davids Timber LTD to add a touch of timeless elegance to your gate project.
- Deck Screws: For secure fastening.
2. Anchor the Fence Posts
- Start by setting your fence posts into the ground. Dig holes that are at least one-third the length of the posts. This depth ensures stability.
- Place each post into its hole, ensuring they stand upright with a spirit level.
3. Plumb the Fence Posts
- With posts in place, fill the holes with concrete mix and allow it to set. This solid base keeps your posts plumb (perfectly vertical) even under pressure.
- Use a level to double-check their alignment as the concrete sets.
4. Constructing the Frame
- Cut your top and bottom planks to match the width of your gate opening.
- Attach these planks horizontally between your anchored fence posts using deck screws.
- Secure sideboards vertically to form a rectangle, ensuring all connections are tight and flush.
Building a robust frame is crucial for long-term functionality. Davids Timber LTD offers quality materials like treated timber fence posts, making them a reliable choice for your gate project.
Reinforcing the Gate Frame
Reinforcing your garden gate frame is essential for ensuring its durability and longevity. One effective way to add extra strength is by incorporating a cross-frame component.
Steps to Reinforce with a Cross-Frame
1. Measure and Cut the Cross Frame Plank:Measure the diagonal distance between the corners of your gate frame. Cut a plank that fits this measurement accurately.
2. Position the Cross Frame Plank:- Place the cut plank diagonally across the frame, ensuring it stretches from one corner of the gate frame to the opposite corner. This cross brace will not only support the overall structure but also distribute weight evenly, preventing sagging over time.
- Use deck screws to firmly attach the cross-frame plank to the gate frame. Ensure that each connection point is tightly secured for maximum stability. Deck screws are ideal for this purpose due to their durability and resistance to outdoor elements.
Adding this cross brace significantly enhances the structural integrity of your garden gate, making it more resilient against daily wear and tear as well as adverse weather conditions.
For premium timber materials that can withstand these reinforcing tasks, consider exploring Davids Timber LTD's Premium Pine Sleepers, which offer excellent strength and durability for such projects. These sleepers, measuring 2600mm x 250mm x 150mm, are made from first-grade reclaimed pine and provide superior stability due to their size and quality.
Alternatively, if you're looking for other wooden products that can be repurposed for DIY projects, Davids Timber LTD also offers solid wooden oak whiskey barrels that can be used creatively in various ways. These barrels, made from steel bands and thick, solid oak staves, are 40-gallon ex-whiskey barrels that can add a touch of rustic beauty to your garden while also serving practical purposes.
Creating the Front of the Gate
Creating the front of your garden gate involves precision and careful assembly. This section will guide you through measuring, cutting, and securing the planks to ensure a robust and visually appealing gate.
Constructing the Front Surface
1. Measuring and Cutting Planks
Begin by measuring the dimensions of your gate frame. Use these measurements to cut planks from high-quality timber. For example, you can opt for new softwood pine railway sleepers which offer a sturdy and aesthetically pleasing option for your gate.
2. Aligning the Planks
Position each plank vertically along the frame, ensuring they fit snugly. It's essential to maintain uniform spacing between the planks to achieve a cohesive look.
Securing the Planks
1. Fastening with Deck Screws
Use deck screws to secure each plank in place. Start at one end of the plank and work your way down, ensuring each screw is driven straight into the frame for maximum stability. The use of deck screws is recommended due to their durability and resistance to rust.
2. Additional Fasteners
Depending on your design preference, you might opt for other fasteners like galvanized nails or bolts. However, deck screws are often preferred for their ease of use and strength.
By meticulously following these steps, you'll create a front surface that not only enhances the structural integrity of your garden gate but also complements its overall aesthetic appeal.
To explore more premium timber options available at Davids Timber LTD, such as new softwood pine railway sleeper boards, visit their website.".
Shaping the Top of the Gate
Choosing the right design for the top of your garden gate can add a distinctive touch to your outdoor space. There are several popular options to consider:
- Gentle Curve: Offers a classic and subtle look.
- Pointed Arch: Adds an elegant, traditional feel.
To ensure precision, outline your chosen shape using a pencil and anchored string. This method allows you to create smooth and accurate curves or arches before cutting.
Steps to Shape the Top of the Gate
- Anchor One End of the String: Secure one end of the string at the center top of your gate frame.
- Draw Your Desired Shape: Stretch the string out to a desired length and use it to guide your pencil in drawing a perfect curve or arch across the top plank.
- Cut Along the Outline: Once you're satisfied with your outline, carefully cut along the penciled line using a saw.
For those who prefer professional assistance, Davids Timber LTD offers specialized cutting services that can help bring your gate design to life:
- Square-cutting service using a chainsaw for reclaimed railway sleepers
- Mitre saw for new sleepers
- Circular saw for timber posts and boards
Davids Timber LTD, established in 2009, has become synonymous with high-quality timber not only in Bedfordshire but across the entire UK. Their expertise and commitment to excellence make them an ideal choice for your gate construction needs.
By taking these steps, with or without professional assistance, you'll achieve a beautifully shaped gate that complements your garden's aesthetic.
Weatherproofing the Gate
Protecting your garden gate from moisture and UV damage is crucial to ensure its longevity. Weatherproofing methods such as applying a sealant or a coat of weather-resistant paint can significantly enhance the durability of your gate.
Importance of Weatherproofing
A garden gate is constantly exposed to various weather conditions, including rain, snow, and direct sunlight. These elements can cause wood to warp, crack, or rot over time. By weatherproofing your gate, you:
- Prevent moisture damage: Sealants act as a barrier against water penetration, reducing the risk of swelling and rotting.
- Shield against UV rays: Weather-resistant paints protect the wood from harmful UV rays that can cause fading and degradation.
Applying Sealant or Weather-Resistant Paint
To effectively weatherproof your gate:
- Choose the right product:Sealants: Opt for a high-quality wood sealant designed to repel water and prevent moisture ingress.
- Weather-resistant paints: Select paints specifically formulated for outdoor use, providing both protection and aesthetic appeal.
- Prepare the surface: Clean the wood thoroughly to remove dirt, debris, and old paint or sealant.
- Sand the surface lightly to ensure better adhesion of the new coating.
- Apply the sealant/paint: Follow the manufacturer's instructions for application. Typically, this involves using a brush or roller to apply an even coat.
Pay special attention to end grains and joints where water is more likely to penetrate.
Allow adequate drying time between coats if multiple layers are required.
By taking these steps, you safeguard your garden gate against environmental damage. For those looking for high-quality materials, Davids Timber LTD offers products like New Green Pressure Treated Feather Edge Fence Boards, which are pre-treated for enhanced durability.
Enhancing your garden's aesthetic while maintaining functionality is key. Explore options such as Solid Wooden Oak Whiskey Planters to complement your beautifully weatherproofed garden gate with unique decor elements.
Building a Double Gate
Creating a double gate is an effective solution for wider openings, providing both accessibility and aesthetic appeal. This guide will take you through the essential steps to ensure your double gate is both functional and visually pleasing.
Steps to Construct a Double Gate System
1. Aligning New Gate Posts:
- Start by aligning new gate posts with the existing adjacent fence posts.
- Use a string line to guarantee that all posts are in perfect alignment.
- Ensure that the posts are securely anchored and plumbed, as these will support the weight of the gates.
2. Attaching the Frame:
- Construct two separate frames for each gate leaf using high-quality timber.
- Attach each frame to its respective set of posts, ensuring they are level and firmly secured.
- Use deck screws to fasten the frame components together, providing stability.
3. Adding Pickets or Panels:
- Once the frames are in place, add pickets or panels to each gate leaf for privacy.
- Secure these elements using appropriate fasteners like deck screws, making sure they are evenly spaced and aligned.
- Consider adding a cross-frame component for additional strength and durability.
To source premium materials for your project, consider exploring Davids Timber LTD. They offer an extensive range of options, including New Brown Treated Hardwood L.Oak Railway Sleepers which can be used for robust construction projects. Additionally, if you're planning on incorporating natural elements into your garden, their Firewood Seasoned Hardwood Logs could be an excellent addition for enhancing your garden's ambiance.
Building a double gate not only maximizes access but also adds a distinguished look to your property. By following these guidelines, you'll create a sturdy and visually appealing entrance that complements your garden's design.
Enhancing Garden Gate Appearance
A garden gate that looks great can significantly elevate the aesthetic appeal of your outdoor space. Here are some creative ideas to enhance its appearance using unique styles and materials:
Unique Styles and Materials
- Latticed Design: A latticed design can add an elegant touch to your garden gate. This style not only offers visual appeal but also allows light and air to pass through, creating a welcoming entrance. Davids Timber provides high-quality timber materials for constructing a sturdy latticed design.
- Floral Archway: Incorporating a floral archway above your gate brings a touch of nature and charm. You can train climbing plants like roses or wisteria to grow over the arch, adding color and fragrance.
- Different Paint Finishes: Experimenting with various paint finishes can help your gate blend seamlessly with your garden's aesthetic. Consider options like matte, semi-gloss, or high-gloss paint, each offering a different look and level of protection.
Creative Integration
Using high-quality timber materials ensures durability while allowing for creative freedom. For example, New Brown Pressure Treated to the following boards from Davids Timber provides a rustic yet sturdy option for constructing a latticed design.
Finishing Touches
Adding details such as decorative hinges, vintage latches, or ornate carvings can further personalize your garden gate. These small touches reflect your style and attention to detail, making your garden entrance truly unique.
By integrating these elements into your garden gate design, you create a functional and beautiful addition to your outdoor space.
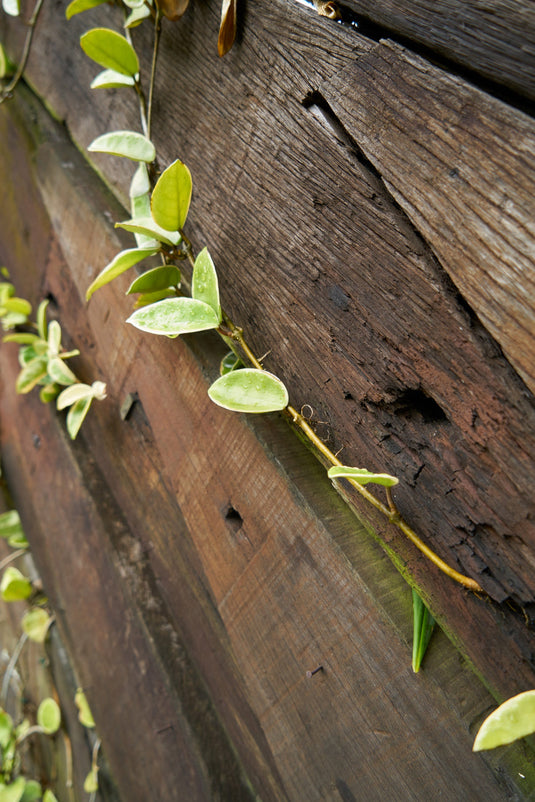
Adding Nature Elements to Garden Gates
Incorporating living plants and flowers into your garden gate design can create a seamless connection to the surrounding garden environment. This blend of natural elements with functional structures enhances both the aesthetic appeal and the ecological value of your outdoor space.
Ideas for Integrating Plants and Flowers:
- Climbing Plants: Utilize climbing plants like ivy, clematis, or wisteria which can be trained to grow along the gate. These plants not only add greenery but also provide a lush, vibrant look.
- Planter Boxes: Attach small planter boxes directly onto the gate. Fill them with seasonal flowers or trailing plants like petunias and geraniums to add bursts of color.
- Living Walls: Consider creating a vertical garden on your gate using modular green wall systems. This can include a variety of herbs, succulents, or even small ferns for a modern, eco-friendly touch.
Steps to Incorporate Nature Elements:
- Choose Appropriate Materials: Select durable timber posts that can support the weight of climbing plants and attached planters. New Timber Posts (3000mm x 75mm x 75mm) from Davids Timber LTD are an excellent choice for their strength and versatility.
- Plan Placement: Determine where you want to place planter boxes or attach climbing plants. Ensure that these additions do not interfere with the gate's functionality.
- Install Support Structures: For climbing plants, install trellises or wire mesh onto the gate frame to guide plant growth.
- Secure planter boxes firmly using brackets or screws, ensuring they are evenly spaced and adequately supported.
- Select Plants: Choose plants that suit your climate and maintenance preferences. Hardy perennials like lavender or rosemary are low-maintenance options.
- Plant and Maintain: Once installed, plant your chosen flora and ensure they receive adequate water and sunlight. Regular pruning will help maintain their shape and encourage healthy growth.
Embracing these natural elements not only beautifies your garden gate but also promotes biodiversity by attracting pollinators like bees and butterflies.
Linking Opportunity: For robust support structures, consider using New Special Pine Railway Sleepers (2400mm x 200mm x 100mm) from Davids Timber LTD, ideal for creating a sturdy base for heavy planters or intricate designs.
Incorporating these nature-inspired enhancements will make your garden gate stand out as a unique feature of your outdoor space, blending seamlessly with its natural surroundings.
Conclusion
Building your garden gate is a rewarding and fulfilling DIY project. The satisfaction and pride that come from creating something with your own hands are unmatched. With the knowledge and techniques shared in this article, you have everything you need to build a beautiful and functional gate.
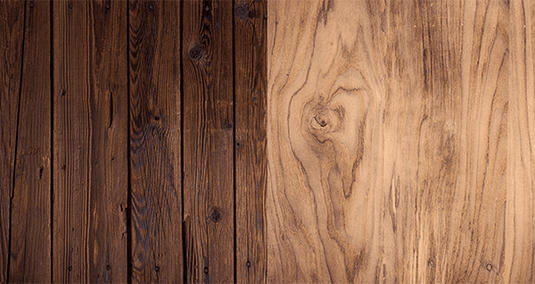
Using high-quality timber is crucial for ensuring the long-lastingness and strength of your garden gate. If you're looking for a wide variety of premium timber options, Davids Timber LTD is the place to go. Their blog post on how to choose the right timber for your DIY project provides valuable insights and tips that will help you make an informed decision when selecting the appropriate timber for your gate.
Are you excited to get started? Grab your tools, sketch out your design, and let your imagination run wild. Happy building!